
Windows
While Nmap was once a Unix-only tool, a Windows version was released in 2000 and has since become the second most popular Nmap platform (behind Linux). Because of this popularity and the fact that many Windows users do not have a compiler, binary executables are distributed for each major Nmap release. We support Nmap on Windows 7 and newer, as well as Windows Server 2008 and newer. We also maintain a guide for users who must run Nmap on earlier Windows releases. Nmap runs equally well on Windows as on Unix in nearly every way, though there are a couple of known limitations:
Nmap only supports ethernet interfaces (including most 802.11 wireless cards and many VPN clients) for raw packet scans. Unless you use the
-sT -Pnoptions, RAS connections (such as PPP dialups) and certain VPN clients are not supported. This support was dropped when Microsoft removed raw TCP/IP socket support in Windows XP SP2. Now Nmap must send lower-level ethernet frames instead.When using Nmap without Npcap, you cannot generally scan your own machine from itself (using a loopback IP such as 127.0.0.1 or any of its registered IP addresses). This is a Windows limitation that we have worked around in Npcap, which is included in the Windows self-installer. Users stuck without a Npcap installation can use a TCP connect scan without pinging (
-sT -Pn) as that uses the high level socket API rather than sending raw packets.
Scan speeds on Windows are generally comparable to those on
Unix, though the latter often has a slight performance edge. One
example of this is connect scan (-sT), which may be
slower on Windows because of different limits in the Windows
networking API. Since this is the one TCP scan that
works over all networking types (not just ethernet, like the raw packet scans),
Nmap includes a collection of Registry changes that substantially improve connect scan performance.
By default these changes are applied for you by the Nmap executable installer, and are also available in the
nmap_performance.reg file
in the nmap-
directory of the Windows binary zip file (for Nmap OEM customers), and
<version>nmap-
in the source tarball (where <version>/mswin32<version> is the
version number of the specific release). These changes increase
the number of ephemeral ports reserved for user applications (such as
Nmap) and reduce the time delay before a closed connection can
be reused. Most people simply check the box to apply these changes in the executable Nmap installer, but you can also apply them by double-clicking on
nmap_performance.reg, or by running the command
regedt32 nmap_performance.reg. To make the changes by hand, add these three Registry DWORD values to
HKEY_LOCAL_MACHINE\SYSTEM\CurrentControlSet\Services\Tcpip\Parameters:
- MaxUserPort
Set a large value such as 65534 (0x0000fffe). See MS KB 196271.
- TCPTimedWaitDelay
Set the minimum value (0x0000001e). See MS KB 149532.
- StrictTimeWaitSeqCheck
Set to 1 so TCPTimedWaitDelay is checked.
Windows users have three choices for installing
Nmap, all of which are available from the
download page at https://nmap.org/download.html.
Windows Self-installer
Every Nmap release includes a Windows
self-installer named
nmap-
(where <version>-setup.exe<version> is the version number of the
specific release). Most Nmap users choose this option since it is so
easy. Another advantage of the self-installer is that it provides the option to install the Zenmap GUI and other tools. Simply run the installer file and let it walk you through
panels for choosing an install path and installing Npcap. The
installer was created with the open-source Nullsoft Scriptable
Install System. After it completes, read the section called “Executing Nmap on Windows” for instructions on executing Nmap on the
command-line or through Zenmap.
Installer options
The installer accepts several command-line options to change the installer behavior or the selection of some of the components of the installation. By default, all components are selected. The options are:
/NMAP=NO- Don't install Nmap
/NPCAP=NO- Don't install Npcap. Unless Npcap is installed separately, some features of Nmap and Nping will not work.
/NCAT=NO- Don't install Ncat.
/NPING=NO- Don't install Nping.
/ZENMAP=NO- Don't install Zenmap. Nmap OEM does not include Zenmap.
/NDIFF=NO- Don't install Ndiff. Nmap OEM does not include Ndiff.
/REGISTRYMODS=NO- Don't install performance-related registry modifications.
/REGISTERPATH=NO- Don't add the installation directory to
PATH.
Additionally, the /D can be used to change the
installation directory. Nmap OEM installers also accept /S
for silent installation.
Command-line Zip Binaries
![[Note]](images/note.png) | Note |
|---|---|
The Zip archive is available to Nmap OEM customers only. Most users prefer installing Nmap with the self-installer discussed previously. |
Every stable Nmap OEM release is also available as Windows
command-line binaries and associated files in a Zip archive. No
graphical interface is included, so you need to run
nmap.exe from a DOS/command window.
Here are the step-by-step instructions for installing and executing the Nmap .zip binaries.
Installing the Nmap zip binaries
Download the .zip binaries from the link provided in your Nmap OEM order.
Extract the zip file into the directory you want Nmap to reside in. An example would be
C:\Program
Files
. A directory callednmap-should be created, which includes the Nmap executable and data files.<version>For improved performance, apply the Nmap Registry changes discussed previously.
Nmap requires the free Npcap packet capture library. We include a recent Npcap installer which is available in the zip file as
npcap-, where<version>-oem.exe<version>is the Npcap version rather than the Nmap version. Alternatively, you can obtain and install the latest version fromhttps://npcap.com.Due to the way Nmap is compiled, it requires the Microsoft Visual C++ Redistributable Package of runtime components. Many systems already have this installed from other packages, but you should run
vc_redist.x86.exefrom the zip file just in case you need it. Pass the/qoption to run these installers in quiet (non interactive) mode.Instructions for executing your compiled Nmap are given in the section called “Executing Nmap on Windows”.
Compile from Source Code
Most Windows users prefer to use the Nmap binary self-installer, but compilation from source code is an option, particularly if you plan to help with Nmap development. Compilation requires Microsoft Visual C++ 2019, which is part of their commercial Visual Studio suite. Any of the Visual Studio 2019 editions should work, including the free Visual Studio 2019 Community.
Some of Nmap's dependencies on Windows are inconvenient to build. For
this reason, precompiled binaries of the dependencies are stored in
Subversion, in the directory /nmap-mswin32-aux.
When building from source, whether from a source code release or from
Subversion, check out /nmap-mswin32-aux as
described below.
Download the Windows dependencies from Subversion with the command svn checkout https://svn.nmap.org/nmap-mswin32-aux. The build files are configured to look for dependencies in this checked-out directory. If you want to build the dependencies yourself instead, you will have to reconfigure the Visual Studio project files to point to the alternate directory.
Decide whether to obtain the Nmap source code by downloading the latest release from nmap.org, or using a Subversion client to retrieve even newer (but less tested) code from our repository. These instructions are for the web download approach, but using Subversion instead is straightforward (see the section called “Obtaining Nmap from the Subversion (SVN) Repository”).
Download the latest Nmap source distribution from
https://nmap.org/download.html. It has the namenmap-or<version>.tar.bz2nmap-. Those are the same tar file compressed using bzip2 or gzip, respectively. The bzip2-compressed version is smaller.<version>.tgzUncompress the source code file you just downloaded. The source code directory and the
nmap-mswin32-auxmust be in the same parent directory. Recent releases of the free Cygwin distribution can handle both the.tar.bz2and.tgzformats. Use the command tar xvjf nmap-version.tar.bz2 or tar xvzf nmap-version.tgz, respectively. Alternatively, the common WinZip application can decompress these files.Open Visual Studio and the Nmap solution file (
nmap-).<version>/mswin32/nmap.slnRight click on
Solution 'nmap'in the Solution Explorer sidebar and choose “Configuration Manager”. Ensure that the active solution configuration isReleaseand then close the Configuration Manager.Build Nmap by pressing F7 or choosing “Build Solution” from the GUI. Nmap should begin compiling, and end with the line “
-- Done --” saying that all projects built successfully and there were zero failures.The executable and data files can be found in
nmap-. You can copy them to a preferred directory as long as they are all kept together.<version>/mswin32/Release/Ensure that you have Npcap installed. The official installer for the latest version is available at
https://npcap.com/#download. Users who install via our binary self-installer will have Npcap installed automatically. Nmap OEM customers can also runnpcap-from our zip package.<version>.exeInstructions for executing your compiled Nmap are given in the next section.
If you wish to build an Nmap executable Windows
installer or Zenmap executable,
see docs/win32-installer-zenmap-buildguide.txt in the Nmap SVN repository.
Many people have asked whether Nmap can be compiled with the gcc/g++ included with Cygwin or other compilers. Some users have reported success with this, but we don't maintain instructions for building Nmap under Cygwin.
Executing Nmap on Windows
Nmap releases now include the Zenmap graphical user interface for Nmap. If you used the Nmap installer and left the Zenmap field checked, there should be a new Zenmap entry on your desktop and Start Menu. Click this to get started. Zenmap is fully documented in Chapter 12, Zenmap GUI Users' Guide. While many users love Zenmap, others prefer the traditional command-line approach to executing Nmap. Here are detailed instructions for users who are unfamiliar with command-line interfaces:
Open Terminal, PowerShell, or Command Prompt. If you are using MSYS2, Cygwin, or WSL, the necessary commands differ slightly from those shown here.
Change to the directory you installed Nmap into. You can skip this step if Nmap is already in your command path (the installer adds it there by default). Otherwise, type the following commands.
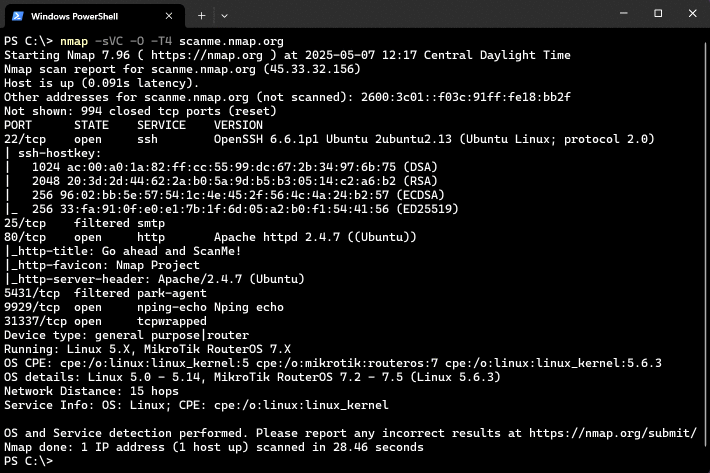
c:cd "\Program Files (x86)\Nmap"Execute nmap.exe. Figure 2.1 is a screen shot showing a simple example.
If you execute Nmap frequently, you can add the Nmap directory
(c:\Program Files (x86)\Nmap by default) to your command execution path:
Open the System Properties window to the Advanced tab by running
SystemPropertiesAdvanced.exe.Click the “Environment Variables” button.
Choose
Pathfrom theSystem variablessection, then hit edit.Add a semi-colon and then your Nmap directory (e.g.
c:\Program Files (x86)\Nmap) to the end of the value.Open a new command prompt and you should be able to execute a command such as nmap scanme.nmap.org from any directory.